
DIY Wood Slat Wall | Hallway & Stair Wall Makeover
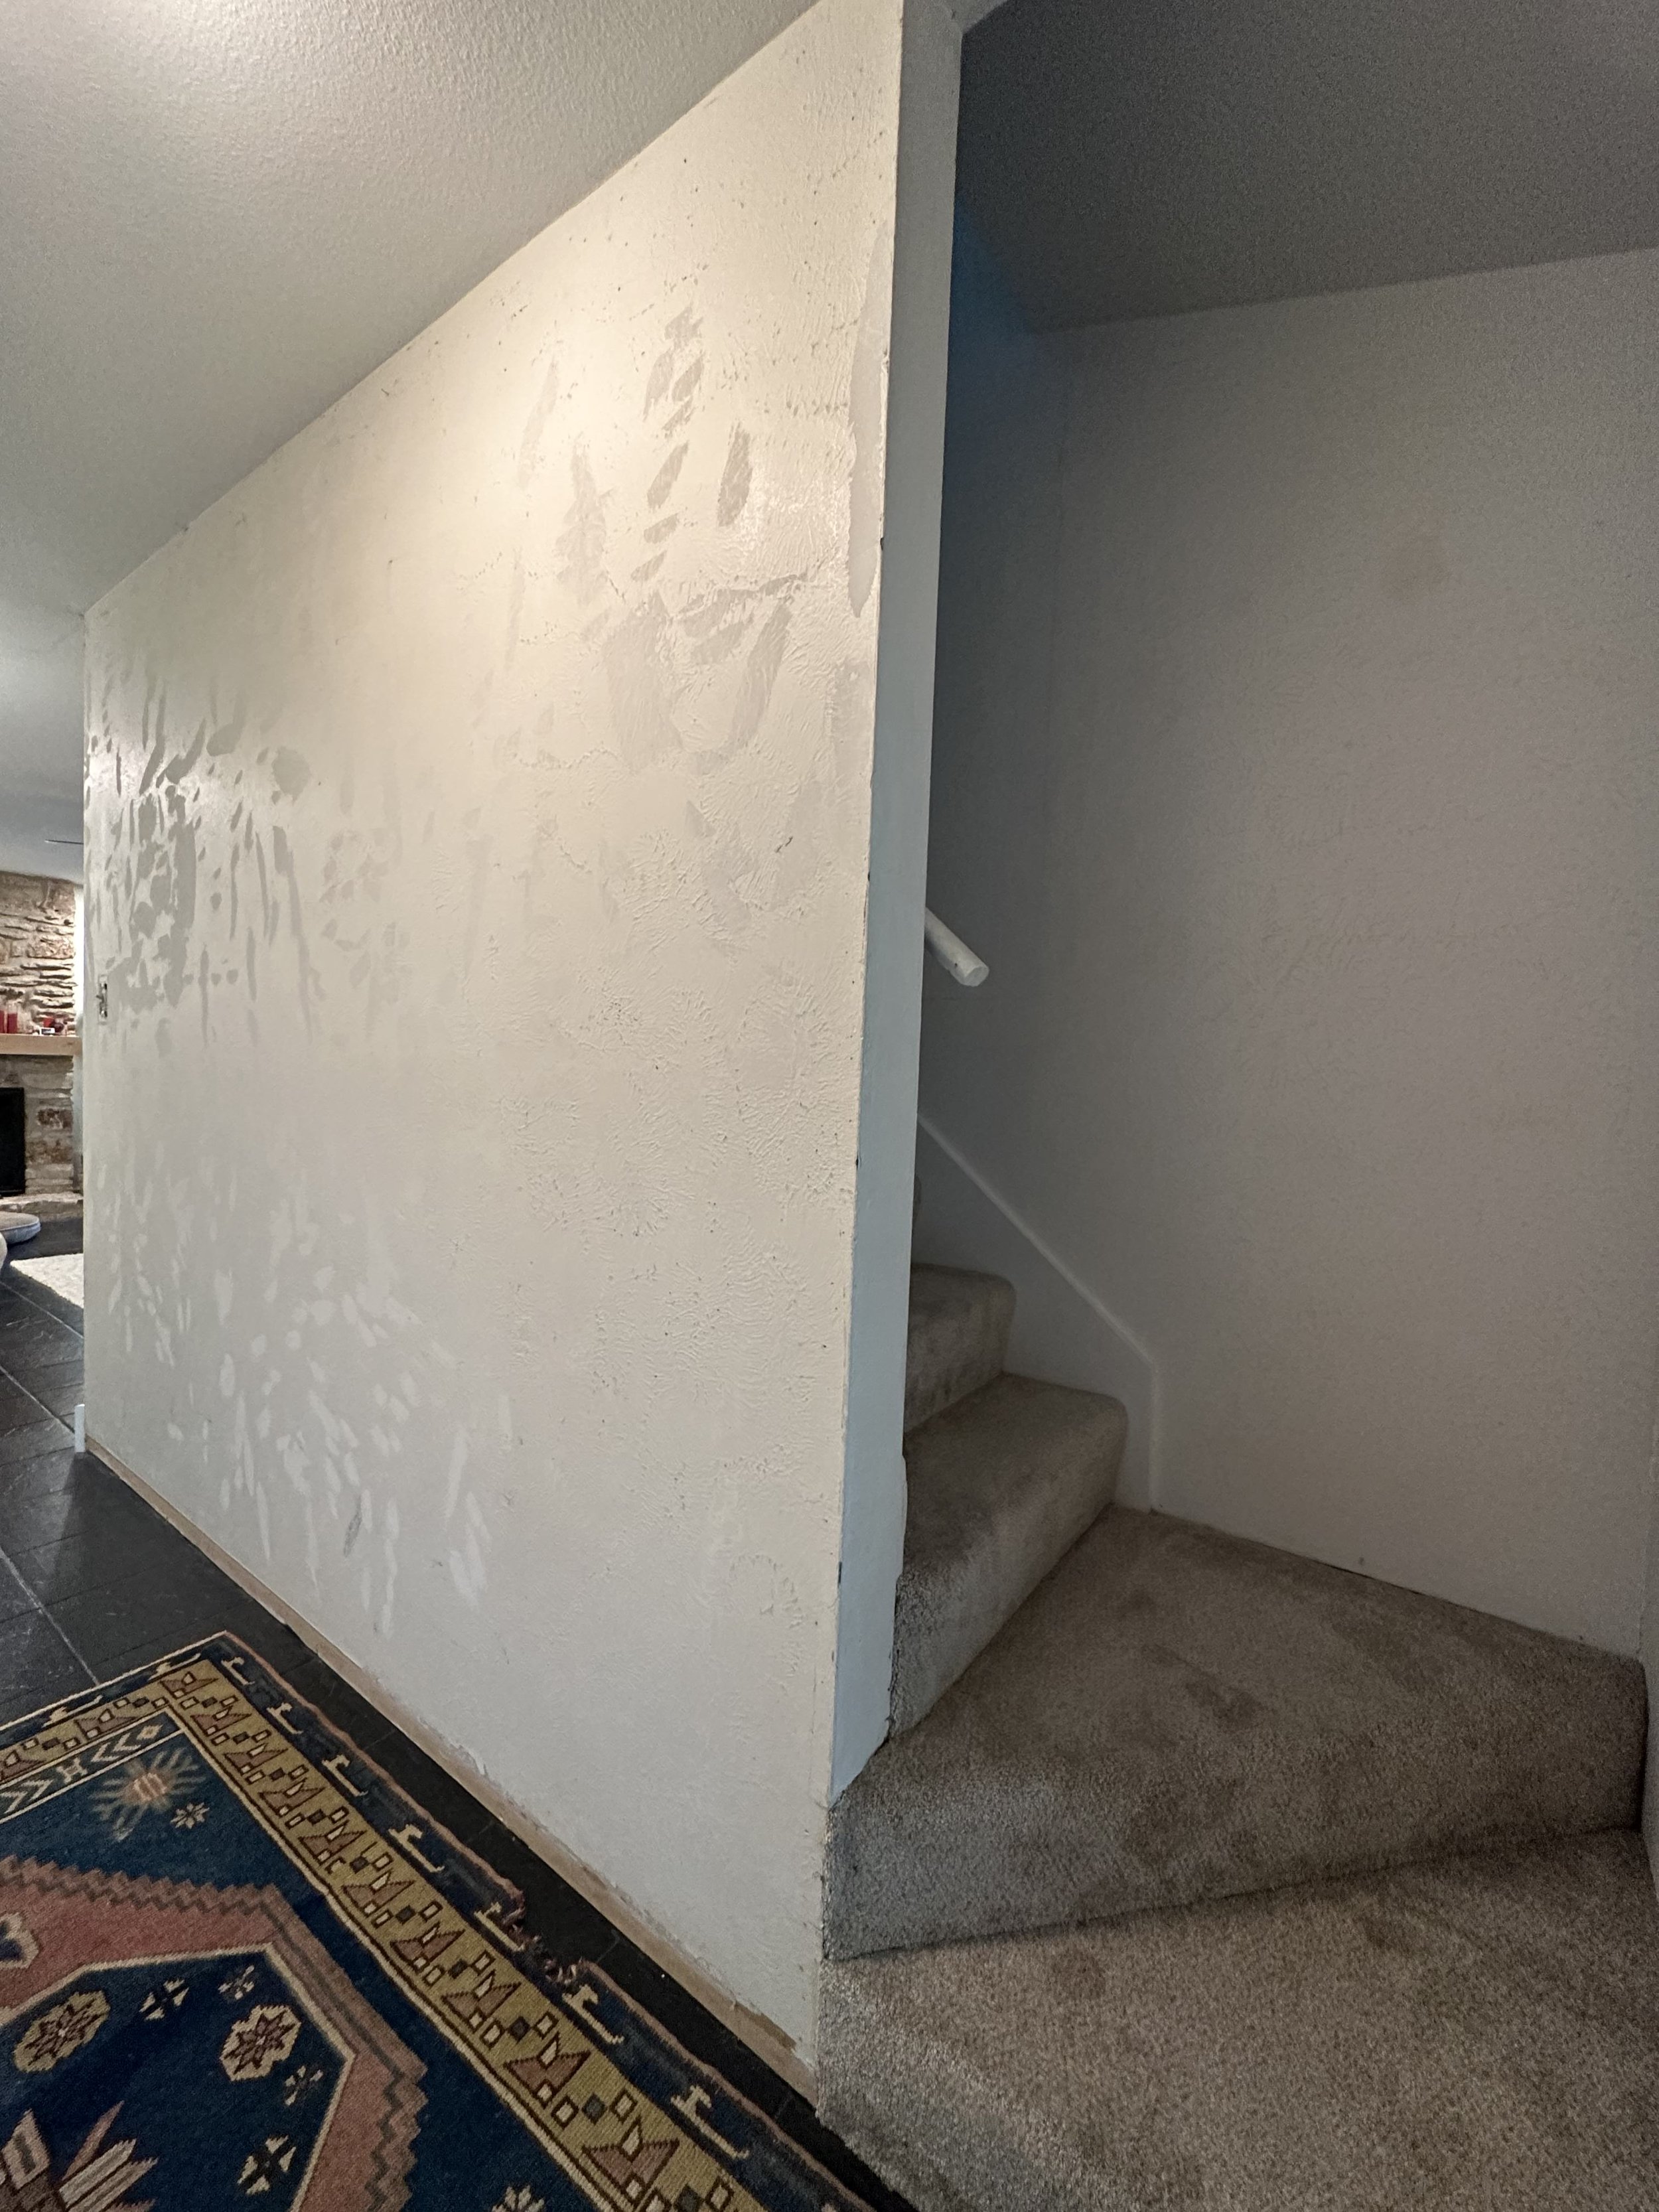
When you first enter our house, there is a stairwell immediately to the right. It’s small and dark and most people completely miss it.
On the stairwell wall (also the entry wall) the previous owners installed a barn wood accent wall, which just wasn’t the style we wanted for our house. We removed the wood when moving in and ever since, the wall has sat unfinished.

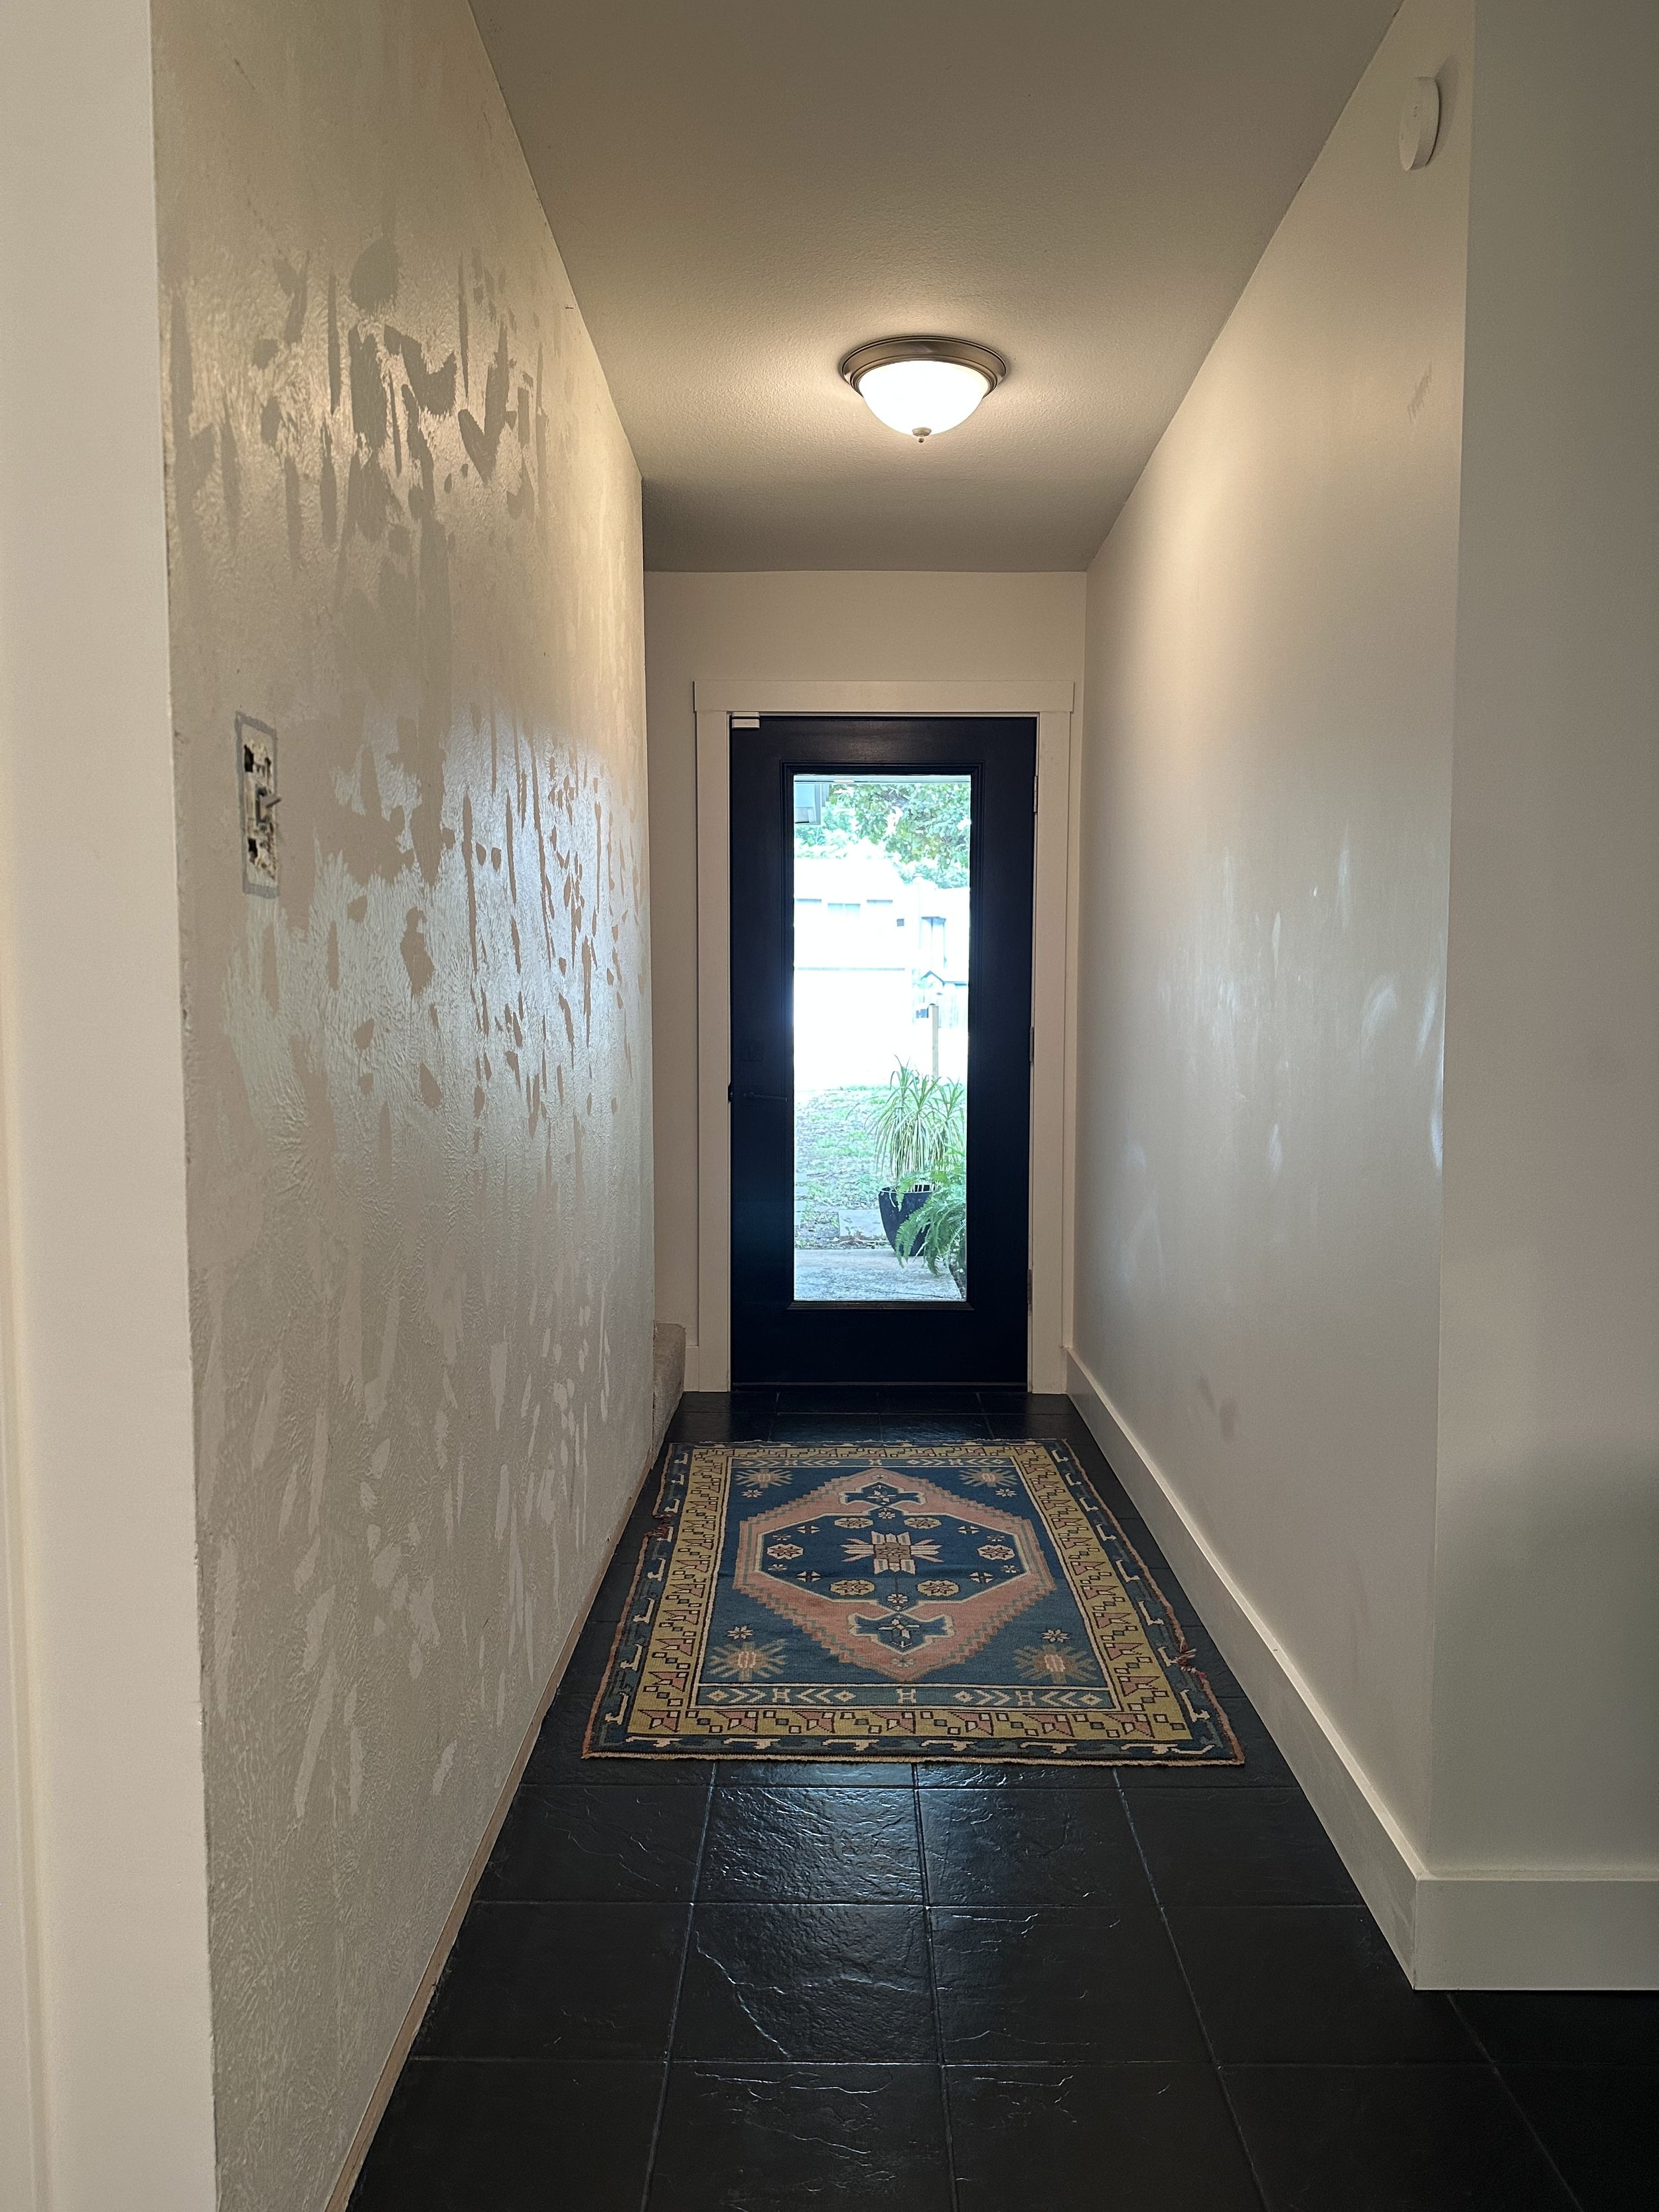
It’s crazy to look back on the barn wood photo above. Since then we have removed the wood, painted the tile floor and removed the old front door and storm door and installed an updated door.
Here is how the wall has looked since removing the barn wood…


In addition to refinishing the wall, I also thought of ways that I could let light into the stairwell, brightening it up as well as creating a larger opening.
A wood slat wall seemed like the perfect answer.
Things I used in this project:

Part of my plan was to open up the wall along the stair line. If you have a stair wall this is something to consider! Thankfully this wall is not load bearing, which makes fully opening the wall much easier.
I removed the drywall and the studs and seeing it opened up was so nice! I cut the drywall along the stair skirting, only opening up the wall into the stairway.


To see the full tutorial (including how I removed the studs) be sure to watch the build video here!
Next I finished all of the drywall corners, skim coated the wall (getting rid of the old textured wall), added a baseboard and painted. This part alone was so nice to finally complete.

And now on to slats! I used solid white oak boards (my favorite), cut into 1.5” wide strips. I attached them with construction adhesive, one screw at the top and one pin nail at the bottom. A laser line level was great help to keep the boards straight and plumb.
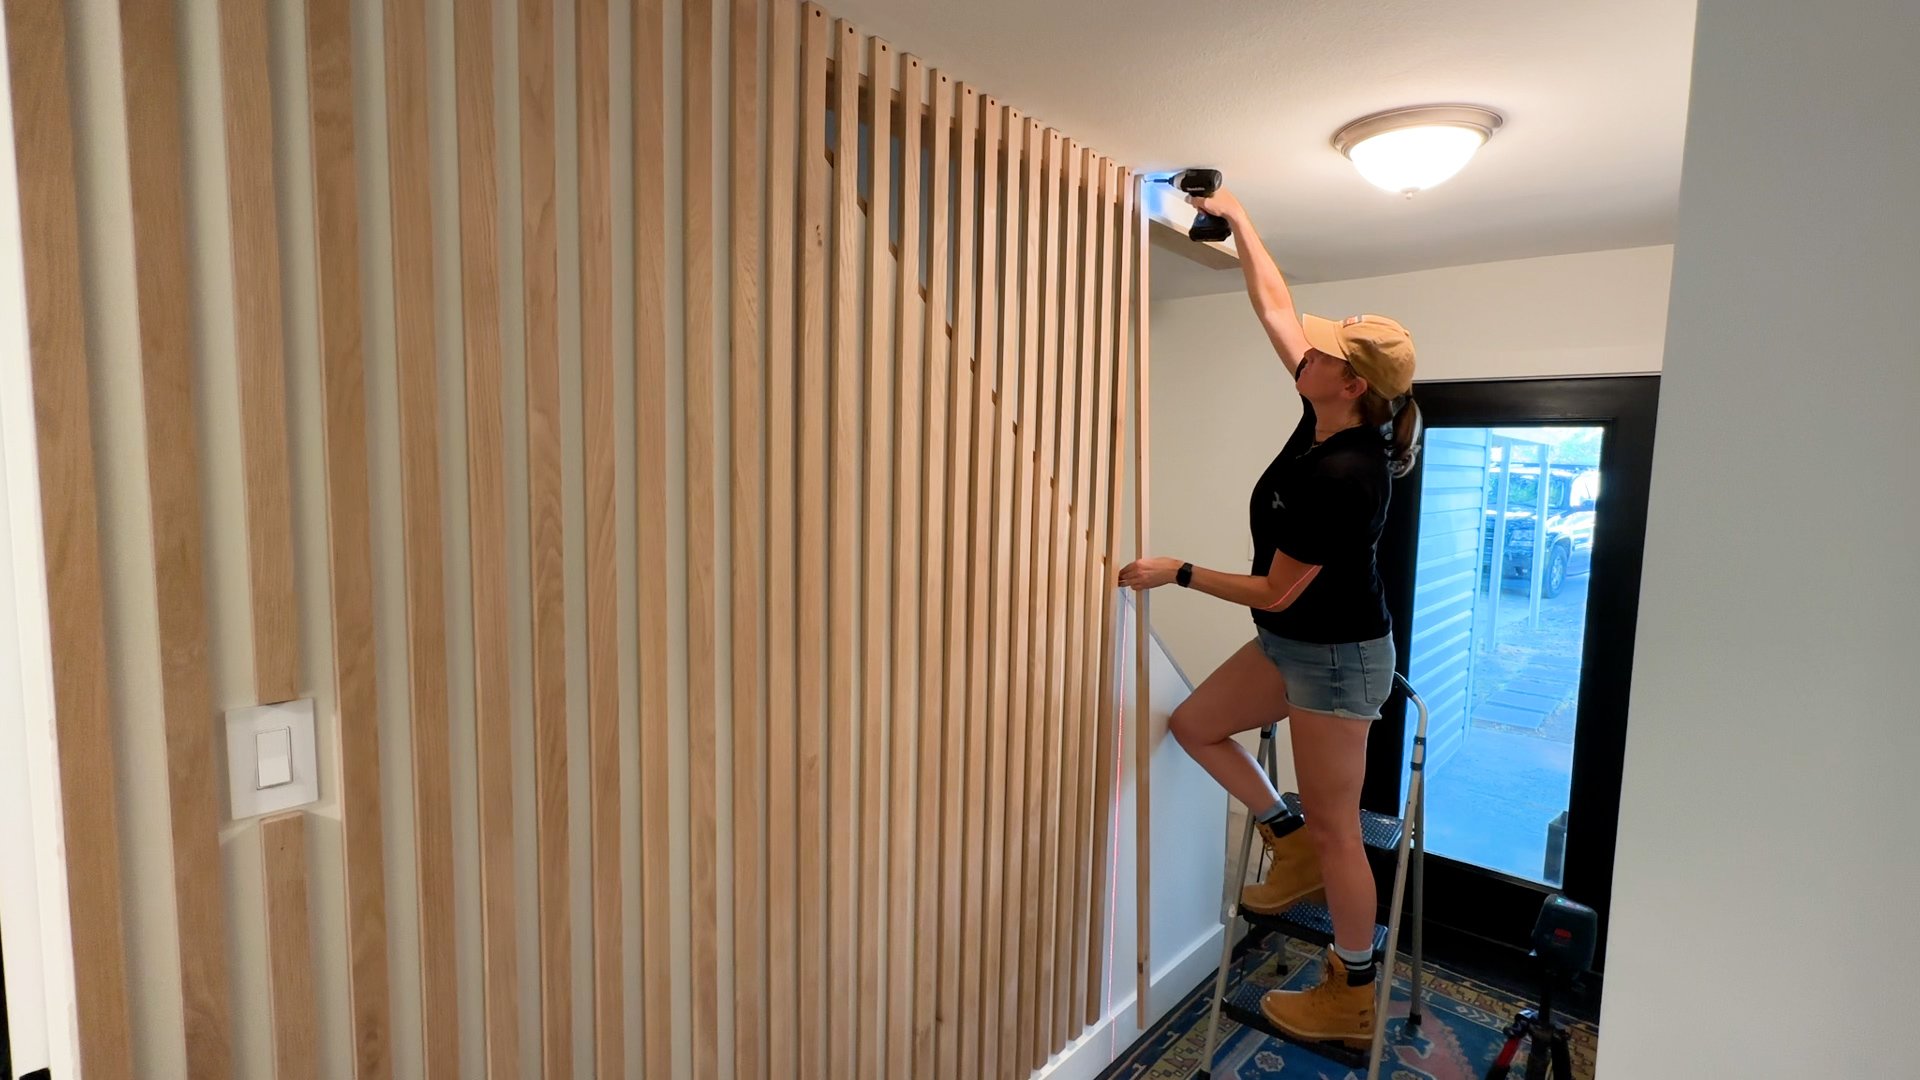

Once all of the slats were installed, I gave them a coat of water based clear finish for protection. And this project is done!
Many more details in the step by step tutorial video here:

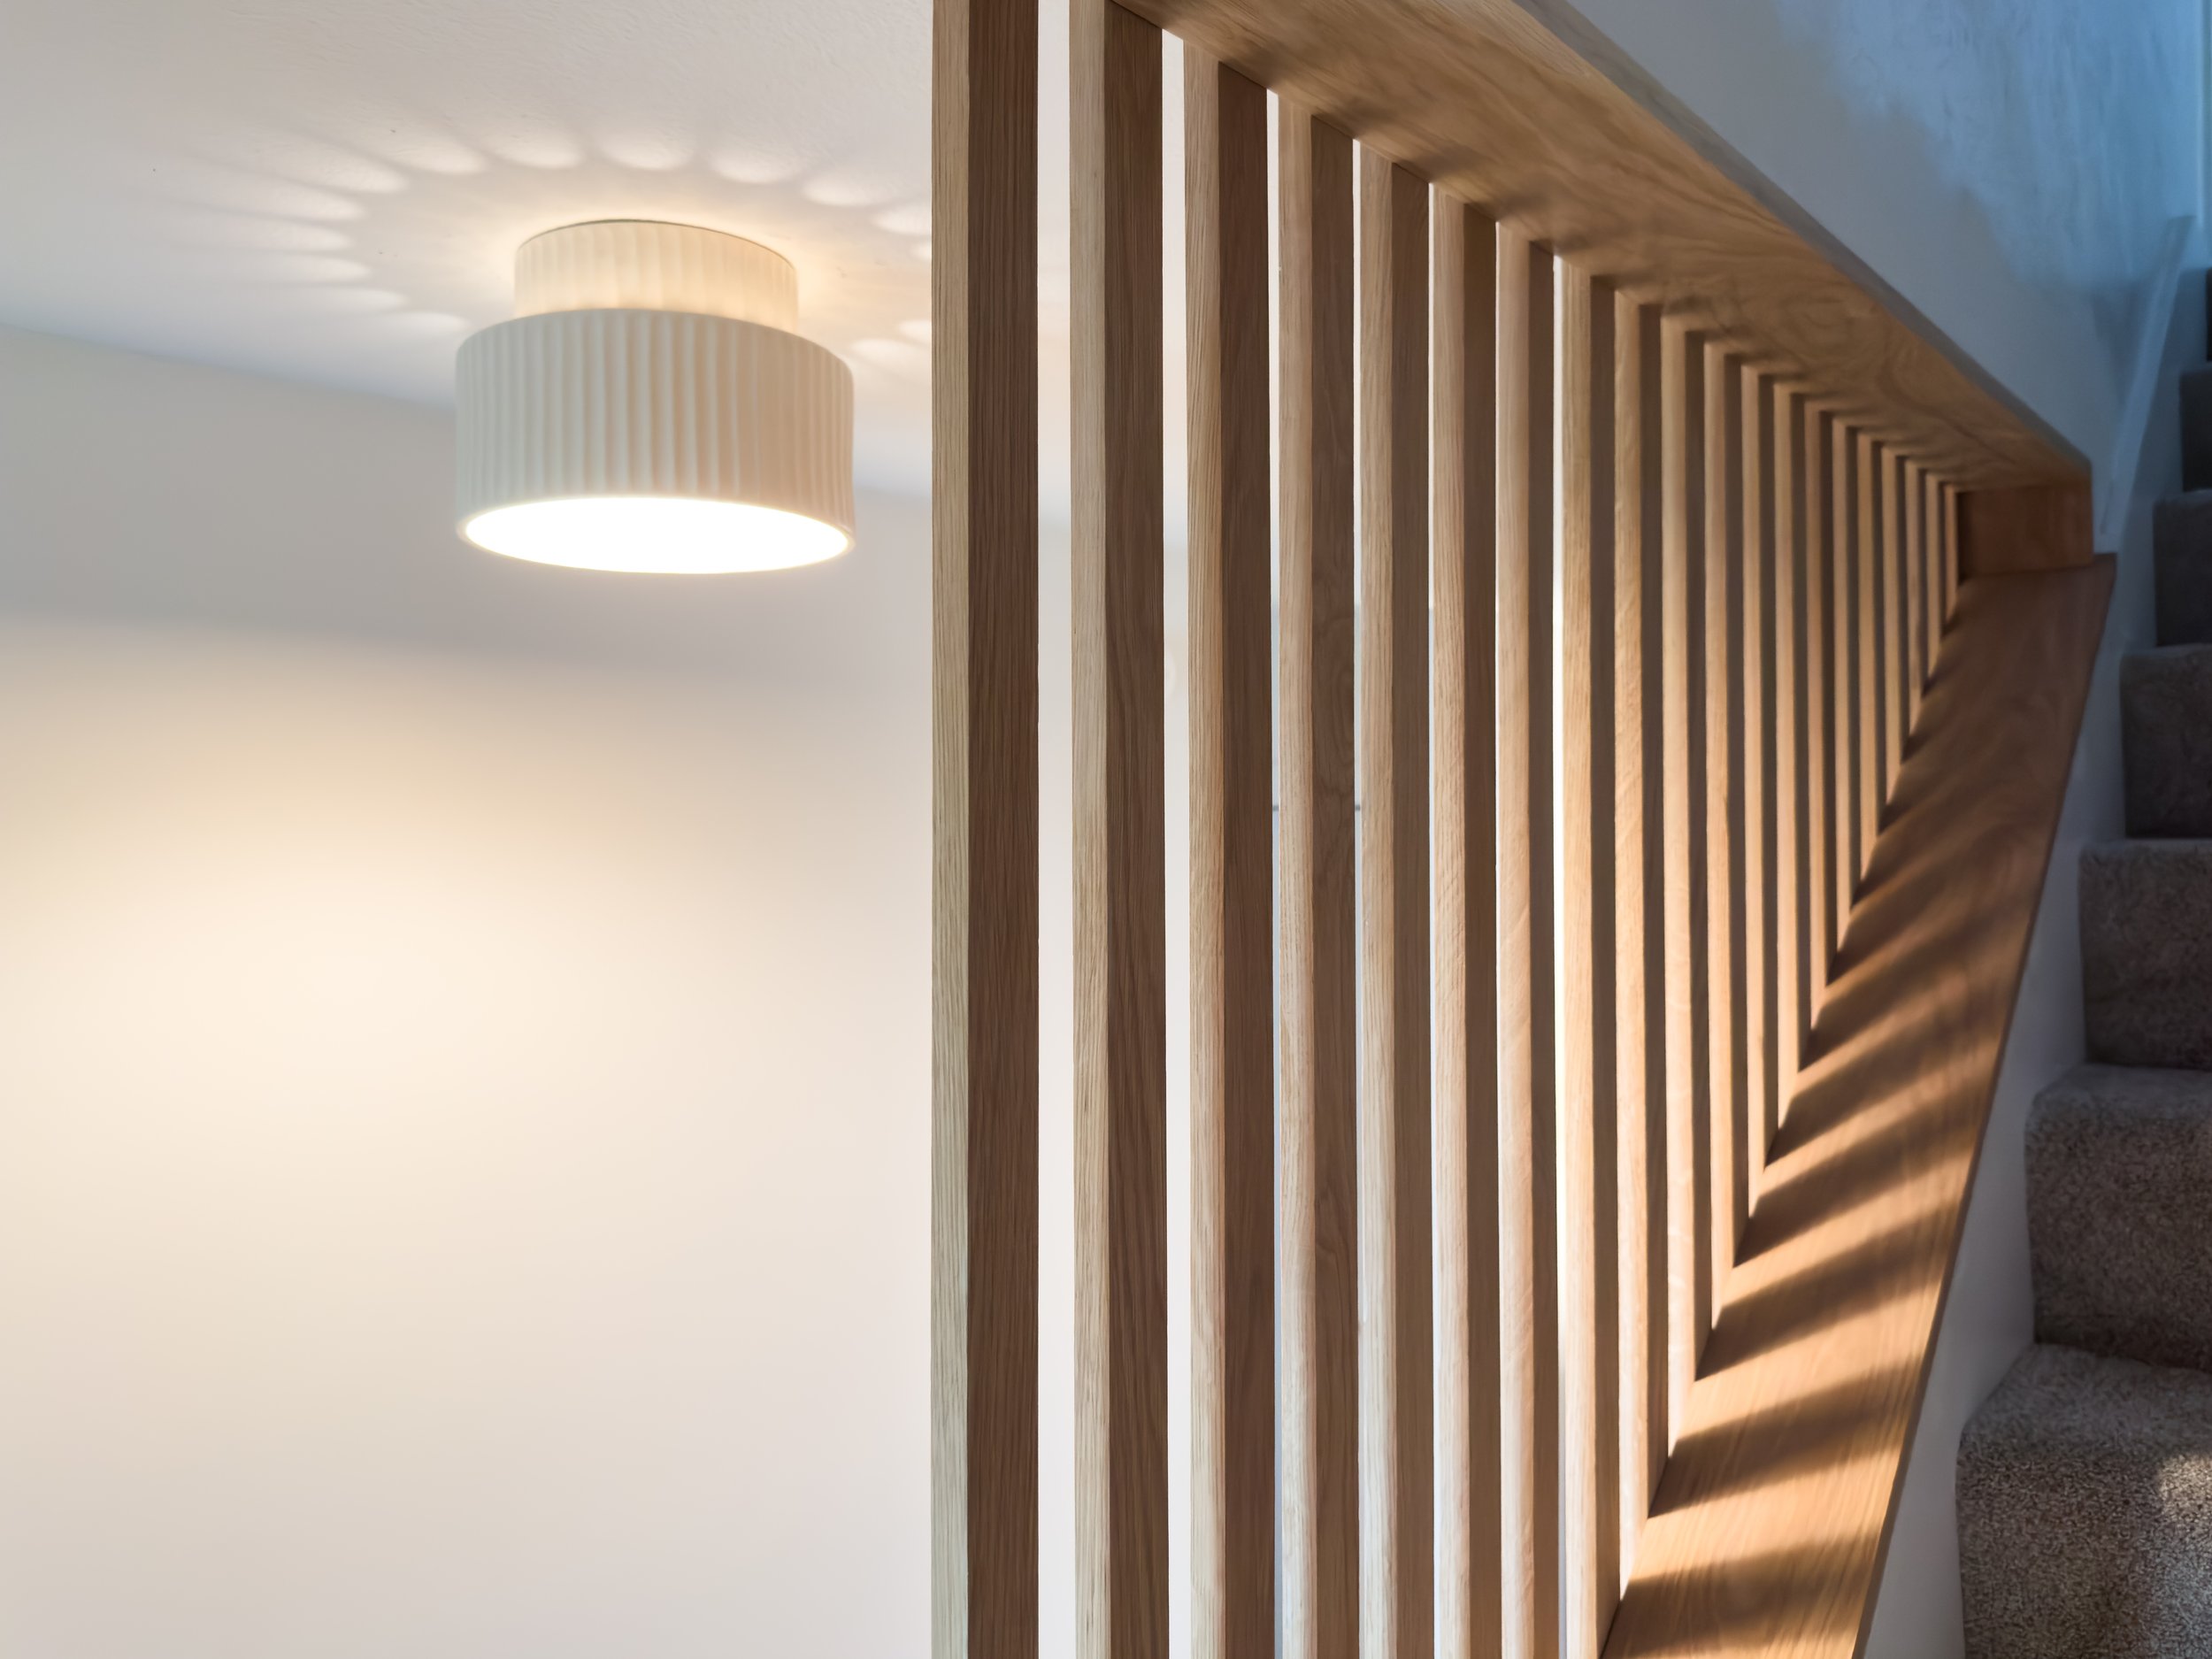


I also changed out the basic boob light for a much better fixture. And with that done, this hallway is officially done!

What an improvement! The white oak is just gorgeous. The whole wall stands out and provides a wonderful new texture, contrast and detail.
before and after…

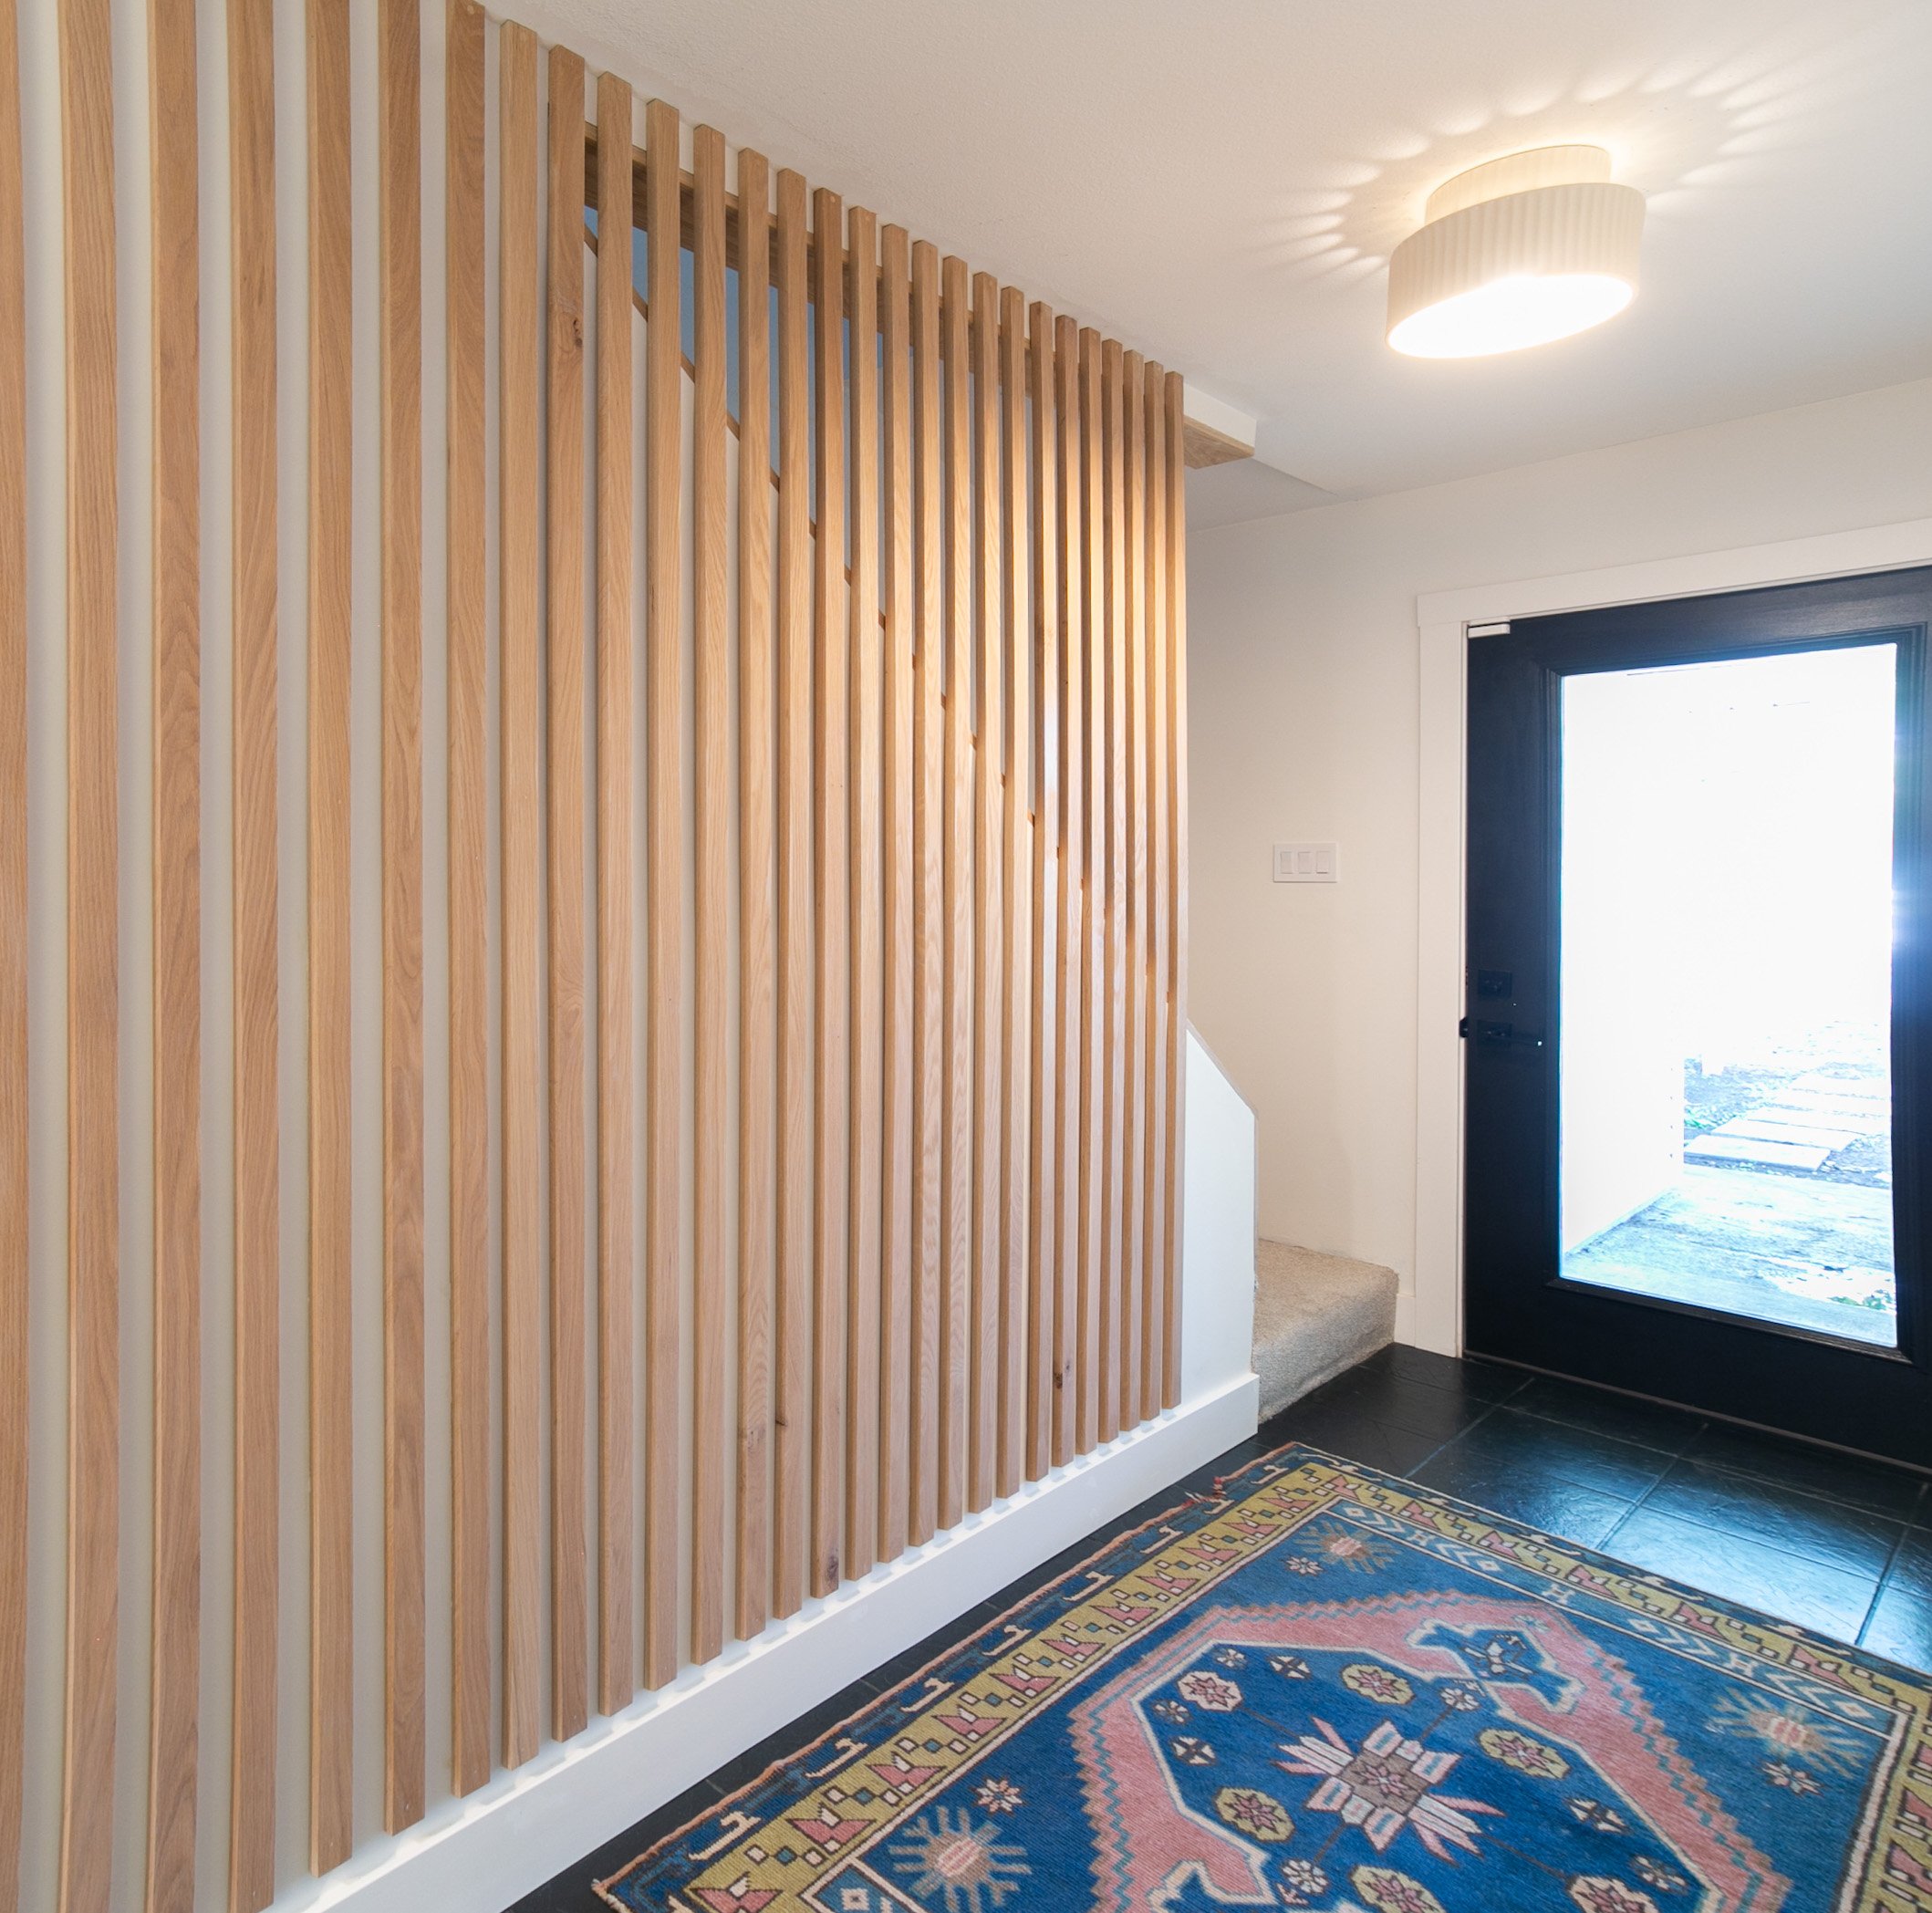
I love how you can see the white wall behind the slats and then it opens up to reveal partial contrasting views into the stairway. And speaking of, the stairway is lighter, brighter, and I love how the shadows cast this cool detail on the inside against the trim. (this area will have its own makeover soon!)
Happy to answer any questions below, or in the comment section of the video. See you on the next project!
Follow Maker Gray:
Instagram @MakerGray https://www.instagram.com/makergray/
Facebook https://www.facebook.com/MakerGray/
TikTok: https://bit.ly/3lXgdHh
If you liked this project and want to stay up to date with what I’m building, then be sure to sign up for my emailed newsletter and you’ll get an email when I post something new.
(Most of the links listed above are affiliate links. As an Amazon Associate I earn from qualifying purchases. Thank you for supporting me in this way.)